There is a certain magic to a truly beautiful lawn—a lush, velvety expanse of green that invites you to walk barefoot and savor a quiet morning. Achieving this dream isn’t about luck; it’s about knowledge and technique. For years, I’ve guided homeowners in transforming patchy, lackluster yards into verdant masterpieces, and the secret often begins with how you plant grass seed. It’s a process that, when done correctly, sets the stage for years of beauty and enjoyment. This guide will walk you through the professional methods that ensure every tiny seed reaches its full potential, creating the perfect lawn you’ve always envisioned.
Key Takeaways for a Flawless Lawn
Here are the foundational secrets to success:
- Timing is Everything: Plant cool-season grasses like fescue and bluegrass in the early fall. For warm-season grasses such as Bermuda and Zoysia, late spring is your golden window.
- Soil is the Soul of Your Lawn: Never skip a soil test. Knowing your soil’s pH and nutrient levels is the single most important step for healthy grass growth.
- Seed-to-Soil Contact is Non-Negotiable: Seeds must be pressed firmly against the soil to germinate. Simply scattering them on hard, unprepared ground is a recipe for disappointment.
- Water Wisely: New seeds require consistent, light moisture. The goal is to keep the top inch of soil damp like a wrung-out sponge, not waterlogged.
The Art of Preparation: Setting the Stage for Success
The difference between a struggling lawn and a spectacular one almost always comes down to the groundwork. A common mistake I see is homeowners investing in premium seed but neglecting the soil it’s meant to grow in. Think of it as building a house—you wouldn’t construct on a crumbling foundation.
First, Understand Your Canvas: The Soil Test
Before you even think about buying seed, you must understand your soil. A simple soil test from your local university extension service is the most valuable tool in your arsenal. It will tell you the soil’s pH and which nutrients are lacking. Most turfgrasses thrive in a soil pH between 6.0 and 7.0, as noted by experts at This Old House. If your soil is too acidic (low pH), the test will recommend adding lime. If it’s too alkaline (high pH), you may need to add sulfur. In my own garden, correcting the pH was the change that finally allowed my lawn to flourish after years of struggling.
Clearing and Cultivating the Land
Once you have your soil test results, it’s time to prepare the area.
- Remove Debris: Clear the area of all rocks, roots, and existing weeds. For a full renovation, this may mean removing the old, tired lawn entirely with a sod cutter.
- Till the Soil: For new lawns on compacted earth, tilling is essential. Use a rototiller to loosen the soil to a depth of at least 3 to 4 inches. This breaks up compaction, allowing new roots, water, and oxygen to penetrate deeply.
- Add Amendments: This is where your soil test proves its worth. Spread the recommended amendments, along with a generous 2-inch layer of high-quality compost, across the tilled soil. Compost improves soil structure, water retention, and microbial life—it’s my go-to for giving any new planting a robust start.
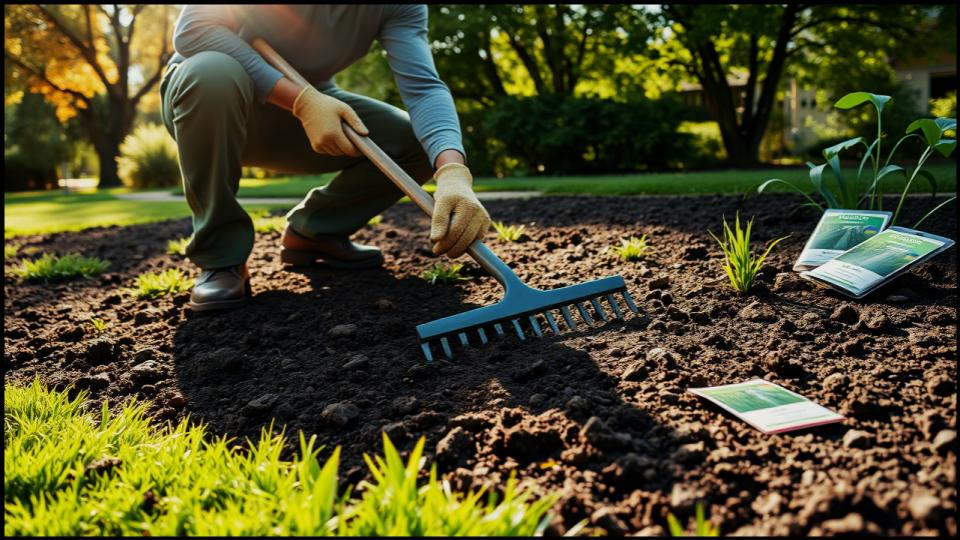
- Grade for Perfection: Rake the entire area smooth, creating a final, level grade. Ensure the soil slopes gently away from your home’s foundation to prevent water issues. This is a crucial step for achieving that uniform, “carpet-like” look and ensuring proper drainage.

TOOLS AND MATERIALS BOX
- Tools:
- Soil Test Kit
- Rototiller (for large, compacted areas)
- Landscape Rake
- Spade or Sod Cutter
- Broadcast or Drop Spreader
- Lawn Roller (optional but recommended)
- Sprinkler
- Materials:
- High-Quality Grass Seed (chosen for your climate)
- Soil Amendments (lime or sulfur, as needed)
- Compost or Topsoil
- Starter Fertilizer (high in phosphorus)
- Straw or Seed-Starting Mulch
How to Properly Plant Grass Seed: The Sowing Process
With your foundation perfectly prepared, it’s time for the main event. Choosing and sowing your seed correctly is a craft that guarantees lush, even growth.
Choose Your Seed Wisely
Not all grass seed is created equal. The most important factor is choosing a variety suited to your climate, as explained by the horticultural experts at Southern Living.
- Cool-Season Grasses: These thrive in regions with cold winters and hot summers, like the northern and central United States. My favorites include Tall Fescue for its durability and drought tolerance, and Kentucky Bluegrass for its beautiful color and texture. Plant these in early fall.
- Warm-Season Grasses: These love the heat and are perfect for the southern states. Zoysia grass creates a dense, luxurious turf, while Bermudagrass is incredibly tough and recovers quickly from wear. Plant these in late spring or early summer.
Always buy high-quality, certified seed. Check the label for the purity level and germination rate—the higher, the better. Cheap seed often contains weed seeds and fillers, which will only cause problems down the road.
The Two-Pass Method for Even Coverage
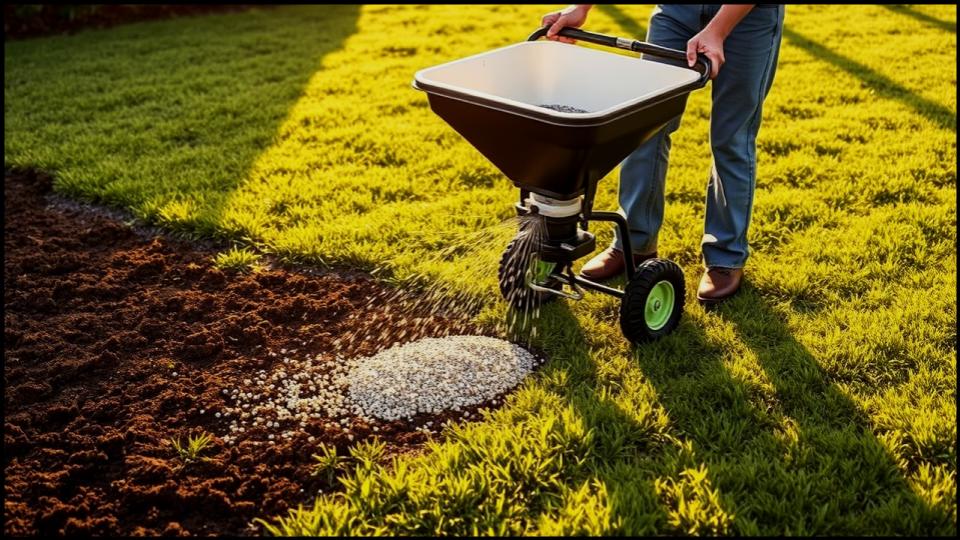
The secret to avoiding a patchy lawn is to distribute the seed with absolute uniformity. The best way to achieve this is with a rotary or drop spreader.
- Calibrate Your Spreader: Follow the instructions on the seed bag to set your spreader to the correct rate.
- Divide and Conquer: Divide your total amount of seed in half.
- Apply the Seed: Apply the first half of the seed by walking back and forth in straight lines across your lawn. Then, apply the second half by walking in a pattern perpendicular to your first pass (like a tic-tac-toe board). This two-pass method, recommended by the University of Minnesota Extensio, is foolproof for even coverage.
Ensure Good Seed-to-Soil Contact
This might be the most overlooked of all grass seed tips. For a seed to germinate, it must be in firm contact with the soil. After spreading your seed, lightly rake the area so that most seeds are covered by about ⅛ to ¼ inch of soil.
For truly professional results, I always recommend using a lawn roller. Rent one from a local garden center and fill it about one-third full with water. Roll the entire seeded area to gently press the seeds into the soil. This single step dramatically increases germination rates.

Nurturing Your New Lawn: The First Crucial Weeks
You’ve done the hard work of preparation and planting. Now, your focus shifts to nurturing those tiny seeds into a thriving lawn. This initial lawn care is critical.
Watering: The Delicate Balance
Proper watering is the key to germination. The goal is to keep the top inch of the soil consistently moist but never saturated.
- First 1-2 Weeks: Water lightly two to three times a day for just 5-10 minutes each time. A fine spray from an oscillating sprinkler is perfect. You want to avoid creating puddles or washing the seeds away.
- After Germination: Once you see a green fuzz of new grass, reduce the frequency to once a day but increase the duration. This encourages the roots to grow deeper in search of water.
- Once Established: After the grass has been mowed two or three times, you can switch to a more typical watering schedule of a deep soaking (about 1 inch of water) once or twice a week, depending on the weather.
To Cover or Not to Cover?
Applying a light top-dressing over your seeds can help retain moisture and protect them from birds. I prefer a very thin layer of clean, weed-free straw or a specialized seed-starting mulch. Avoid hay, as it is full of unwanted seeds. This covering also helps prevent soil erosion on any sloped areas.
The First Mow
The sound of the first mow over a new lawn is incredibly satisfying! Wait until the new grass blades are about 3-4 inches tall. Ensure your mower blade is very sharp; a dull blade will tear the tender new grass instead of cutting it cleanly. For this first mow, set your mower to its highest setting and never remove more than one-third of the grass blade’s height at a time.
Your Reward: A Lawn to Be Proud Of
There is profound satisfaction in cultivating a beautiful patch of earth. By following these professional steps to plant grass seed, you are not just growing grass; you are creating an outdoor living space that will bring you joy and pride for years to come. You are laying the groundwork for a perfect lawn that will be the envy of the neighborhood. So, roll up your sleeves, get your hands a little dirty, and prepare to watch the magic unfold.
