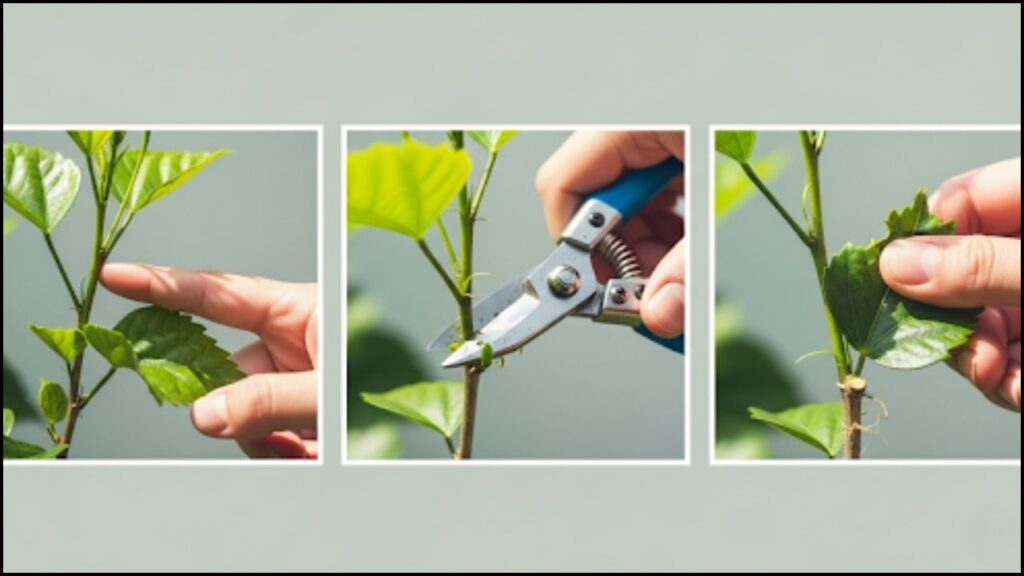
For gardeners aiming to multiply their floral displays, horticultural experts confirm that the period from late summer into early fall is the optimal window to propagate hibiscus. This season provides ideal conditions for taking softwood cuttings, an accessible and highly effective method for creating genetically identical new plants from a healthy parent.

Late Summer is the Prime Season to Propagate Hibiscus
| Key Step | Detail | Rationale |
| Optimal Timing | Late Summer to Early Fall | Stems are at the “softwood” stage—mature enough to root but not yet woody. (Source: University of Florida IFAS Extension) |
| Cutting Selection | 4- to 6-inch tip from new growth | This section contains active cells ideal for root development and has not expended energy on flowering. |
| Rooting Medium | Well-draining mix (e.g., perlite, sand, peat) | Prevents waterlogging and root rot, a common failure point. (Source: American Hibiscus Society) |
| Success Booster | Use of rooting hormone | Contains auxins that significantly increase the speed and success rate of root formation. |
Why Timing is Critical for Successful Propagation
The success of creating new plants from hibiscus cuttings is heavily dependent on seasonal timing. According to horticultural research from institutions like the University of Florida IFAS Extension, taking cuttings during the late growing season leverages the plant’s natural state. At this point, the current year’s growth has matured from soft, flimsy new shoots into what is known as “softwood” or “semi-hardwood.”
“These stems possess the perfect balance,” explained Dr. Alena Petrova, a botanist specializing in plant propagation. “They are firm enough to survive the process without wilting immediately but still contain active, vigorous cells ready to differentiate into new roots. Trying this with very new, green growth in spring often leads to rot, while using old, woody stems can result in a complete failure to root.”
This period also typically offers favorable ambient temperatures and humidity, which reduce the stress on a cutting once it is separated from the parent plant. This stability allows the cutting to focus its energy on developing a new root system.
How to Propagate Hibiscus: A Step-by-Step Method
Executing the propagation process with precision is key to achieving a high success rate. Experts at botanical gardens and agricultural extensions agree on a standardized method that is both simple and effective for home gardeners.
1. Selecting and Preparing Healthy Cuttings
The quality of the cutting directly determines the viability of the new plant. Begin by selecting a healthy, disease-free parent plant.

- Identify the Right Stem: Look for a branch tip from the current season’s growth that is about the thickness of a pencil. It should not have any flowers or buds.
- Make the Cut: Using a sterilized, sharp knife or pruning shears, take a 4- to 6-inch cutting. Make the cut at a 45-degree angle just below a leaf node (the small bump where a leaf emerges). According to the American Hibiscus Society, this angle increases the surface area for root development.
- Prepare the Cutting: Carefully remove all leaves from the bottom half of the cutting. If any large leaves remain at the top, they can be cut in half horizontally to reduce water loss through transpiration.
2. Using Rooting Hormone for Enhanced Growth
While it is possible for some hibiscus cuttings to root without aid, the use of a rooting hormone is widely recommended to ensure consistent success. These products, available as powders, gels, or liquids, contain synthetic auxins that stimulate adventitious root growth.
“Rooting hormone is an inexpensive form of insurance,” Dr. Petrova noted. “It can cut the time it takes for roots to form by weeks and dramatically increases the number of cuttings that successfully establish.”
To use it, pour a small amount of the hormone into a separate container to avoid contaminating the main supply. Moisten the bottom inch of the hibiscus cutting with water, dip it into the rooting hormone, and gently tap off any excess powder.
3. Planting and Creating a Humid Environment
The final step involves providing the cutting with the ideal environment for growing hibiscus from cuttings.
- Choose a Sterile Medium: Fill a small pot with a well-draining, sterile potting medium. A mix of equal parts peat moss and perlite or sand is effective because it retains moisture without becoming waterlogged.
- Plant the Cutting: Use a pencil or a small stick to poke a hole in the center of the medium. This prevents the rooting hormone from being scraped off during planting. Insert the cutting about 1.5 to 2 inches deep and gently firm the soil around it.
- Maintain Humidity: Water the medium lightly. To create a mini-greenhouse effect that keeps humidity high, cover the pot with a clear plastic bag, making sure the bag does not touch the leaves. Secure it with a rubber band.
From Cutting to Established Plant: Patience is Key
Once planted, place the pots in a warm location with bright, indirect light. Direct sunlight can scorch the cutting. Check the soil every few days and water only when the top layer feels dry to the touch. Overwatering is a primary cause of failure.
Roots typically begin to form within four to eight weeks. You can check for root growth by gently tugging on the cutting; if you feel resistance, a root system has started to develop. Once several roots are well-established, the plastic bag can be removed, and the new plant can be gradually acclimated to normal conditions before being repotted into a larger container. The new plant will likely not produce flowers until the following growing season, once it has devoted enough energy to establishing a strong root and foliage system.
A Guide to Growing Mint in Water: Simple Hydroponics for Home Gardeners
